CREATING YOUR OWN SOURDOUGH STARTER
- racheljordan042
- Jun 25, 2024
- 3 min read
CREATING A STARTER
(bypass this part if you already got a starter from someone else)
WHAT YOU NEED:
- glass jar
- unbleached all-purpose flour
- filtered water (I personally use spring water)
- spoon or small spatula
- kitchen scale
- rubber band
Day 1: You'll want to weigh the glass jar and write that number down somewhere so you don't forget it. Put it on the scale and zero it out. Now, mix together the same ratio of flour and water. For this particular example, let's say 50g flour + 50g water. Mix thoroughly and scrape the sides of the jar. Let it sit for 24 hours.
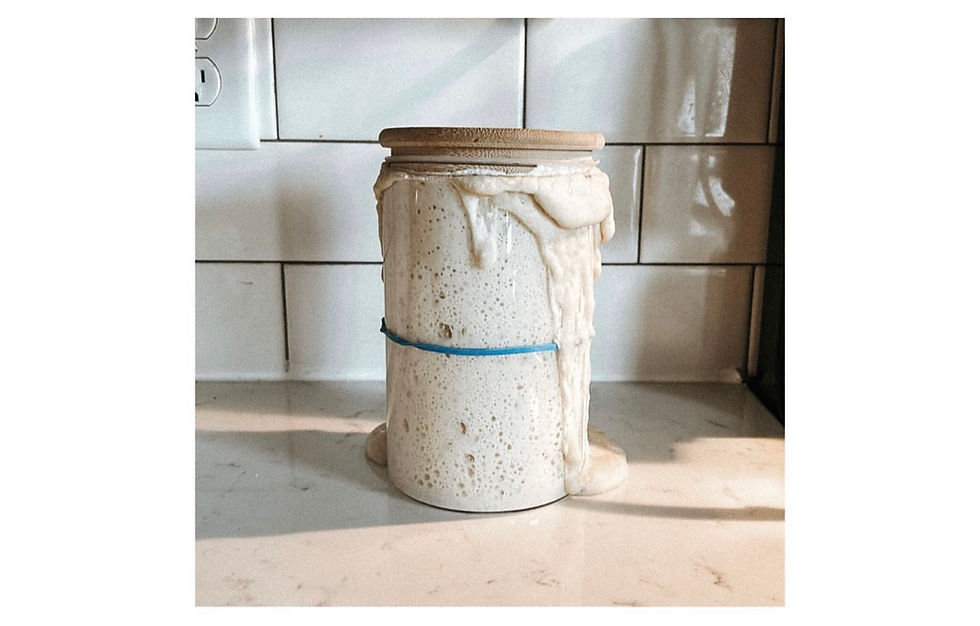
Day 2: Now place the jar back on the scale. It'll weigh the weight of the jar + the 100g of mixture in there. Discard (take out) half of the mixture (50g). Add 50g flour + 50g water. This is called a 1:1:1 ratio. Meaning... equal parts starter/flour/water. Stir well, scrape the sides of the jar, cover loosely again and now put a rubber band around the jar at the spot of where your starter goes up to. Let it sit for 24 hours.
Day 3: You should see lots of activity going on. Your starter probably grew well above the rubber band line and you most likely see lots of bubbles throughout your starter. This is because of the gas that happens when the bacteria "eats" the flour & water you fed it. But now it's hungry again... so it's time for another feeding! Discard 100g and keep 50g. Feed it 50g flour + 50g water. Again, a 1:1:1 ratio. Cover loosely and let it sit for 24 hours.
Day 4: Now you will feed it twice a day. Repeat step 3. But this time, let it sit for 12 hours. Twelve hours later... repeat the discard/feeding process.
Day 5-7: Repeat the same feeding process every twelve hours. Keep in mind, this is where things may get frustrating or discouraging. Some days it seems like the starter is active and making lots of changes while other days it seems like not much is happening. This is normal. It's all part of the process. Patience is key. Stick with it, don't give up.
Day 8: Hopefully you start seeing lots of growth and activity going on with your starter. If your starter is at least doubling in growth within 5-8 hours after feeding it, that's your cue it's ready to bake your first loaf of bread! But don't be surprised if it takes another week or two to consistently double in size within that 5-8 hour time frame. Sourdough starters truly take TIME to mature and grow in strength. Every person's home environment is different and the temperature of your home will greatly impact how quickly your starter rises. So keep that in mind. The warmer it is, the faster it'll grow.
Continue with this schedule of feeding for the first few weeks to help establish a strong starter. Remember, it's only a few minutes of your day each time you discard/feed it. Pretty simple!
MY STARTER IS SLACKING, WHAT DO I DO?
Try feeding it a higher ratio... so a 1:4:4. Meaning, 1 part starter to 4 parts water and 4 parts flour. So for example... if you keep 10g starter, you'd feed it 40g water and 40g flour. Some starters just really thrive better with more "food" to consume.
Try feeding it slightly more flour than water to thicken up the consistency.
You can make a small portion of your flour amount be whole wheat flour... whole wheat tends to really ramp things up. Or rye flour.
Make sure you place the starter in a warm spot! Put it next to the stove if you're in the middle of cooking. Or try a cozy cabinet somewhere in your kitchen. Some people will put it in their microwave and keep the door slightly open so the light stays on. The light will give off warmth. Others will keep their starter in the oven with the light on (but be careful not to forget it's in there and preheat your oven!). You want your starter to be in a relatively warm place but you also don't want it to get TOO warm for too long and deal with a runny mixture. You want to keep the mixture thick.

Comments